
Your First SSH Connection
This article describes how to provide access from PrivX users to hosts. The high-level steps involve:
- Adding users to PrivX.
- Providing permissions to users by assigning them to roles.
- Adding hosts to PrivX.
Prerequisites
You need a licensed PrivX deployment. To quickly set up PrivX, see Quick Server Setup.
You will also need a host for PrivX users to connect to This target host must satisfy the following:
-
The PrivX server must be able to establish SSH connections to the target host.
-
The target host has a
rootaccount that can be connected to via SSH.
Adding Local Users
Create users in PrivX, which allows people to log into hosts via PrivX:
-
Navigate to the address of the PrivX server and log in as superuser.

-
In the PrivX GUI, navigate to the Administration→Users page and click Add User.

You will be presented with the New User view. -
In the New User view, provide the required information about the user. Click Save to save the user.

You should now be able to see your new local user back on the Administration→Users page.

PrivX provides access in a role-based manner. To create a role and assign members:
-
In the PrivX GUI, navigate to the Administration→Roles page, and click Add Role.
You will be presented with a form for providing information about the new role.")
-
Provide a name for the new role. Also add users to the role by defining rules. To define a new rule for the role, click Add Rule. In this example, we add a rule to include the local user(s) who have the principal alice into the role:

Note
The number of role members is indicated by Matching users. The count is updated when you unfocus from the Search String field (such as by pressing enter, or by clicking somewhere else in the GUI).
Leave the other role settings as they are.
-
Click Save to finalize role creation. Your new role should be visible back on the Administration→Roles page.


Adding Hosts Manually
Make hosts accessible via PrivX:
On the Administration→Hosts page, click Add Host. Provide at least:
-
The Name and the network Addresses of the host. This data helps users identify the target host.
-
The Services (SSH and/or RDP servers) available on the host. In this example we add the SSH server by providing its FQDN address and port number.
-
The Accounts to which roles are mapped on the target host. Leave the Password empty to require password authentication upon connecting. In this example we allow the previously-created example role to access the host as target user
root.Note
If you are adding an RDP host which uses domain accounts, you must use the username@domain syntax. For example, for domain account Domain\Administrator, the correct syntax is Administrator@Domain.
-
Enable SSH - Trust on first use to allow users to accept the SSH host key upon login.

Click Save to save the host.
You may verify that the host is listed back on the Administration→Hosts page.
Connecting via the GUI
After you have set up roles to access hosts, you may test connections as follows:
-
Log into the PrivX GUI as the test user we created previously.
-
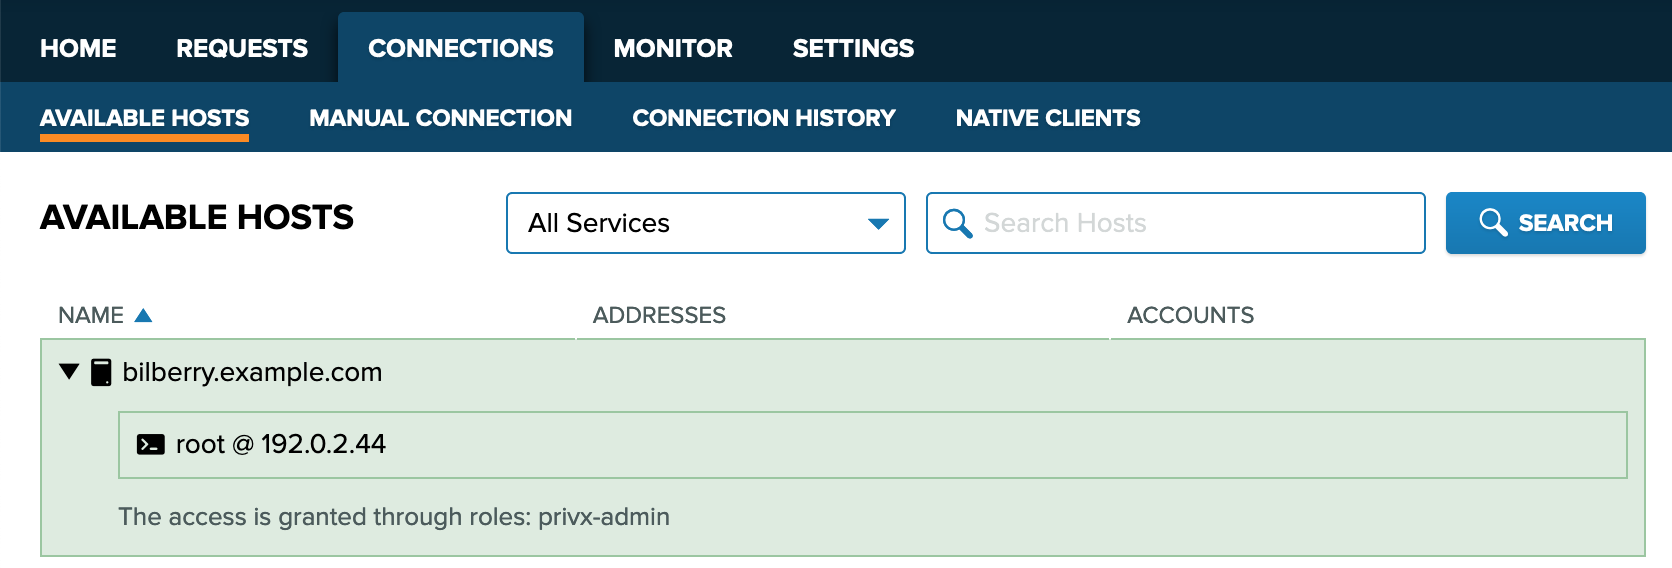
Navigate to the Connections→Available Hosts page. The hosts you can connect to are listed under Available hosts.
Expand a connection entry to display its available services. In this example, we click the SSH-server service to connect to our test host.
-
Accept the SSH host key if prompted. Authenticate to the host by providing the password of the target account (not the PrivX account password). You should now be successfully connected to the host.

You may increase the security of future connections by enabling certificate authentication. For more information about certificate-authentication setup, see Certificate Authentication for OpenSSH Connections.
Updated about 3 years ago