
Manual Certificate-Authentication Setup
To manually enable certificate-based authentication, you must configure your target hosts as follows:
-
Ensure the system clocks are synchronized (for example, using NTP). The certificates issued by PrivX have very short validity periods: clock skew may cause authentication to fail.
-
The SSH server on the target host must be configured to trust certificates issued by PrivX.
-
For target user accounts, specify the principals that are allowed to connect. Depending on the target-host OpenSSH version, you can do this in either of the following methods:
-
For OpenSSH 6.9 or later: Set up the principals-command script provided with PrivX. Allows PrivX users of selected roles to login with their personal accounts. Additionally, you can define the target accounts and the roles that may access them.
-
For OpenSSH 5.6 or later: Configure allowed principals per target account. You can define the target accounts and the roles that may access them.
-
-
To display the target hosts and accounts under connection targets in PrivX, add the host to PrivX as described in Setting up Hosts.
Principals in PrivX-Issued Certificates
This section describes principals in the context of certificate-based authentication.
OpenSSH certificates contain principals indicating who is requesting access. OpenSSH certificates issued by PrivX contain at least the user name as a principal, and may have any number of other principals. For example, assume a PrivX user named alice belongs to roles having the principals:
bd5eab79-fe35-4f52-839a-05737075b152
b8b72199-689d-5a9b-782f-8e1069f7db19
When PrivX user alice connects to a target host using certificate authentication, PrivX issues them a certificate with the following principals:
bd5eab79-fe35-4f52-839a-05737075b152
b8b72199-689d-5a9b-782f-8e1069f7db19
alice
Authentication succeeds if the target account allows at least one of the principals.
Trusting PrivX Certificates
Target hosts using certificate-based authentication must be configured to trust the certificates issued by PrivX.
-
In the PrivX GUI, go to the Administration→Deployment→Deploy and Configure SSH target hosts page. Select Configure manually. Acquire the PrivX CA key.

Copy the PrivX CA key. This key is later required for configuring the target host.
-
On the target host, save the PrivX CA key into
/etc/ssh/privx_ca.pub. Also ensure that the CA-key file is owned and readable by the user running the SSH server (typically root):# chown root:root /etc/ssh/privx_ca.pub # chmod 0400 /etc/ssh/privx_ca.pub -
In the SSH server configuration file (by default at
/etc/ssh/sshd_config), specifyTrustedUserCAKeysto point to the PrivX CA key. To do this, add a line similar to the following into the SSH server configuration:TrustedUserCAKeys /etc/ssh/privx_ca.pubRestart the SSH server to apply the new settings.
-
Certificates issued by PrivX are very time-sensitive. Even a clock skew of few minutes may prevent certificates from working correctly.
Verify that the target-host time is correct. Adjust as necessary.
Allowing Login as Self and Role-Based Access
PrivX provides a principals-command script that enables login with personal accounts: PrivX users can log into the target accounts, the names of which match the PrivX user's Windows/Linux username.
Note
The principals-command script is only supported on target hosts running OpenSSH 6.9 or later.
The provided principals-command script is provided as an example. You may modify the script to suit your own needs.
To set up the principals-command script, enable login with personal accounts, and to configure role-based access:
-
PrivX users who are to access the target host must belong to at least one PrivX role. If you have not done so already, assign users to roles as described in Managing Roles.
Also ensure that PrivX users are set with correct Windows username and Linux username. By default, AD users' Windows username and Linux username are set to match their User-Principal Name and sAMAccountName respectively.
-
For security reasons we recommend creating a user specifically for running the principal-command script on the target host. This AuthorizedPrincipalsCommandUser should be an unprivileged user who only has permissions for performing the following:
-
Running the principals-command script.
-
Reading the principals that are allowed to log in with personal accounts, at
/etc/ssh/personal_account_roles. -
Reading any user-specific authorization-principals files located at
/etc/ssh/auth_principals/%u(replace `%u with the name of the authenticated user).
Some Unix distributions have a default
nobody account, which can be used as the AuthorizedPrincipalsCommandUser. -
-
Obtain the AuthorizedPrincipalsCommand script from your PrivX server, at
/opt/privx/authorizer/principals_command.sh.Copy the script to the target host. In this example, we assume the script is copied to
/etc/ssh/principals_command.sh.Both the script and the directory it is in must be owned by root. The script must also be readable and executable by the AuthorizedPrincipalsCommandUser (replace
/etc/ssh/principals_command.shwith the path to which you copied the script):# chown root:root/etc/ssh # chown root:root/etc/ssh/principals_command.sh # chmod 0755 /etc/ssh/principals_command.sh -
Configure SSH server to run the principals-command script as the AuthorizedPrincipalsCommandUser. This is done by adding lines similar to the following into the SSH configuration (by default at
/etc/ssh/sshd_config, replace authprincipalsuser with the name of your AuthorizedPrincipalsCommandUser, replace/etc/ssh/principals_command.shwith the path where you copied the script ):AuthorizedPrincipalsCommand /etc/ssh/principals_command.sh %u AuthorizedPrincipalsCommandUser authprincipalsuserSave your changes to the SSH server configuration file. Restart the SSH server to apply the changes.
-
Next, specify who is allowed to access target accounts. Note that all access must be specified in a role-based fashion.
-
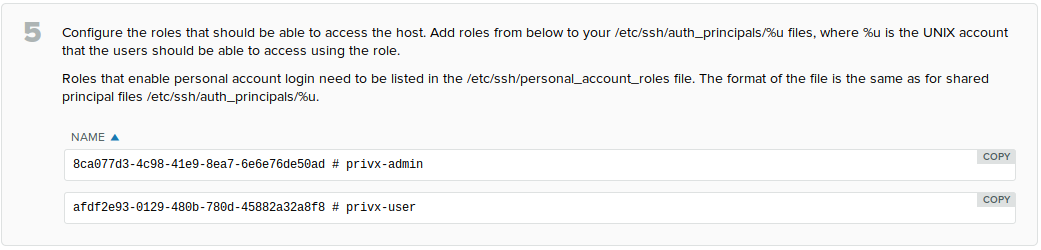
To allow login with personal accounts for members of certain roles: On the target host, specify in /etc/ssh/personal_account_roles which PrivX-role members are allowed to log in with personal accounts. The file should specify one UUID per line, similar to the following:
269eaef2-482e-5b44-5d0f-2ee4c37e2877 # Example Admins
31f070c6-33ff-523f-4cea-d586ab25071a # Example Role
8a0c0cbb-1417-4de2-8532-3eac1fb4c30b # Example Users
...
To determine the UUIDs of PrivX roles. Go to Administration→Deployment→Deploy and Configure SSH target hosts page, then select Configure manually.
Also ensure the file is readable by root and the AuthorizedPrincipalsCommandUser:
# chown root:root /etc/ssh/personal_account_roles
# chmod 0604 /etc/ssh/personal_account_roles
PrivX users belonging to the specified roles may now log into the host as themselves. For example, a PrivX user belonging to the Example Admins role (with role UUID 269eaef2-482e-5b44-5d0f-2ee4c37e2877) with the Linux username alice may now log in to the target-account named alice (assuming the host is Unix/Linux-based).
-
To grant custom role-based access to certain target accounts: Create the directory
/etc/ssh/auth_principals/for holding target-account-specific principals files (if not already done):```bash # mkdir /etc/ssh/auth_principals # chown root:root /etc/ssh/auth_principals/ # chmod 0755 /etc/ssh/auth_principals/ ``` For each target account requiring custom role-based access, create a principals file under `/etc/ssh/auth_principals/`. The principals file must have the same name as the target account. For example, when setting up custom role-based access for a target account named *alice*, the principals file is `/etc/ssh/auth_principals/alice`.
In the principals file, specify the roles that may access the account. The file should specify one UUID per line, similar to the following:``` 269eaef2-482e-5b44-5d0f-2ee4c37e2877 # Example Admins 31f070c6-33ff-523f-4cea-d586ab25071a # Example Role 8a0c0cbb-1417-4de2-8532-3eac1fb4c30b # Example Users ... ``` After saving your changes to the file, ensure it is readable and executable by both root and the *AuthorizedPrincipalsCommandUser* (replace `/etc/ssh/auth_principals/alice` with the path to the user's principals file): ```bash # chown root:root /etc/ssh/auth_principals/alice # chmod 0705 /etc/ssh/auth_principals/alice ```
-
-
Certificates issued by PrivX are very time-sensitive. Even a clock skew of few minutes may prevent certificates from working correctly.
Verify that the target-host time is correct. Adjust as necessary.
You may verify that certificate-authentication is used by checking the OpenSSH-server logs on the target server. Upon successful certificate authentication there should be a log message like the following:
Accepted publickey for alice from 192.0.2.26 port 50930 ssh2: RSA-CERT \
ID [email protected]:53188 serial 4920619392583124720 \
(serial 4920619392583124720) \
CA RSA 98:16:36:bf:6e:c6:3f:e5:a1:5e:31:61:c1:37:ef:d8
Allowing Role-Based Access
PrivX roles have unique principals. When a target user allows a role principal, members of corresponding roles can connect to the target user.
To allow the members of a PrivX role to access a target user:
-
On the target host, create a directory for storing principals files (if not already done).
# mkdir /etc/ssh/auth_principalsThe permissions of the directory must be set so that individual target users are able to read their authorization-principals files, for example:
# chown root:root /etc/ssh/auth_principals # chmod 0755 /etc/ssh/auth_principals -
On the target host, create a file for storing the user-specific allowed principals (replace
%u with the account name of the target user on the target host):
/etc/ssh/auth_principals/%uFor example, if the target-user name is alice, their principals file is:
/etc/ssh/auth_principals/aliceWithin the file, specify the UUIDs of the roles that are allowed access to the target-user account. Specify each UUID on its own line, similar to the following:
269eaef2-482e-5b44-5d0f-2ee4c37e2877 # Example Admins
31f070c6-33ff-523f-4cea-d586ab25071a # Example Role
8a0c0cbb-1417-4de2-8532-3eac1fb4c30b # Example Users
...
To determine the UUIDs of PrivX roles. Go to Administration→Deployment→Deploy and Configure SSH target hosts page, then select Configure manually.
-
Ensure that the authorization-principals file is owned and readable by the target-user account (replace
%u with the name of the target-user account):# chown %u:%u /etc/ssh/auth_principals/%u # chmod 0400 /etc/ssh/auth_principals/%uFor example, if the target-user name is alice:
# chown alice:alice /etc/ssh/auth_principals/alice
# chmod 0400 /etc/ssh/auth_principals/alice
If not already done, instruct the SSH server about where the authorization-principals files can be found from. This can be done by specifying the AuthorizedPrincipalsFile setting in the OpenSSH server configuration (by default at
/etc/ssh/sshd_config):AuthorizedPrincipalsFile /etc/ssh/auth_principals/%uSave your changes to the OpenSSH server configuration. Restart the OpenSSH server to apply the changes. PrivX users belonging to one or more allowed principals (roles) are now authenticated to the target-user account using certificates.
-
Certificates issued by PrivX are very time-sensitive. Even a clock skew of few minutes may prevent certificates from working correctly.
Verify that the target-host time is correct. Adjust as necessary.
You may verify that certificate-authentication is used by checking the OpenSSH-server logs on the target server. Upon successful certificate authentication there should be a log message like the following:
Accepted publickey for alice from 192.0.2.26 port 50930 ssh2: RSA-CERT \
ID [email protected]:53188 serial 4920619392583124720 \
(serial 4920619392583124720) \
CA RSA 98:16:36:bf:6e:c6:3f:e5:a1:5e:31:61:c1:37:ef:d8
Updated about 3 years ago