Integrating PrivX with XSOAR
To integrate PrivX with Cortex XSOAR by Palo Alto Networks, do the following:
- Install XSOAR
- Install PrivX content pack.
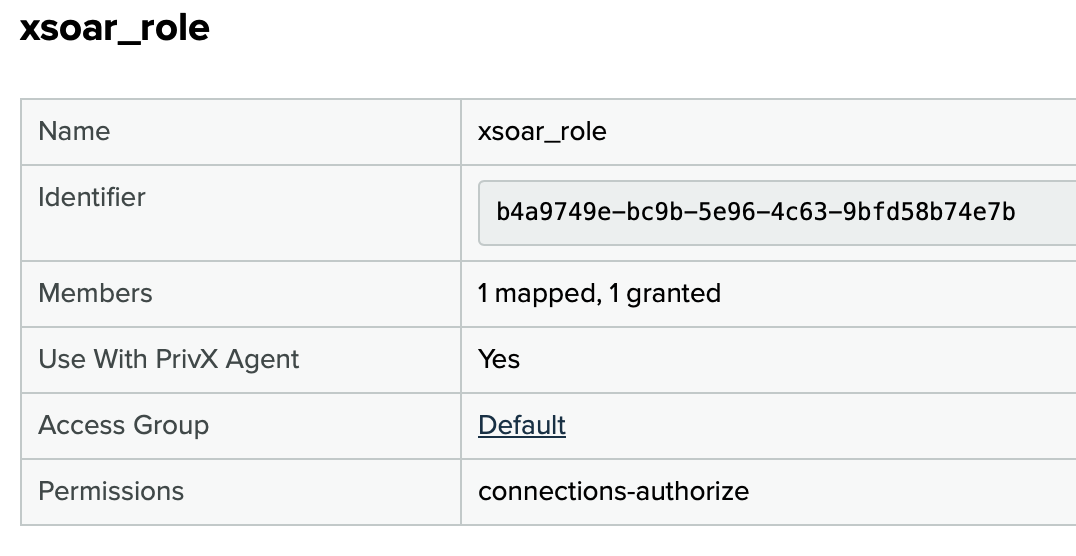
- Create a new PrivX role. Grant the role with connections-authorize permissions:

-
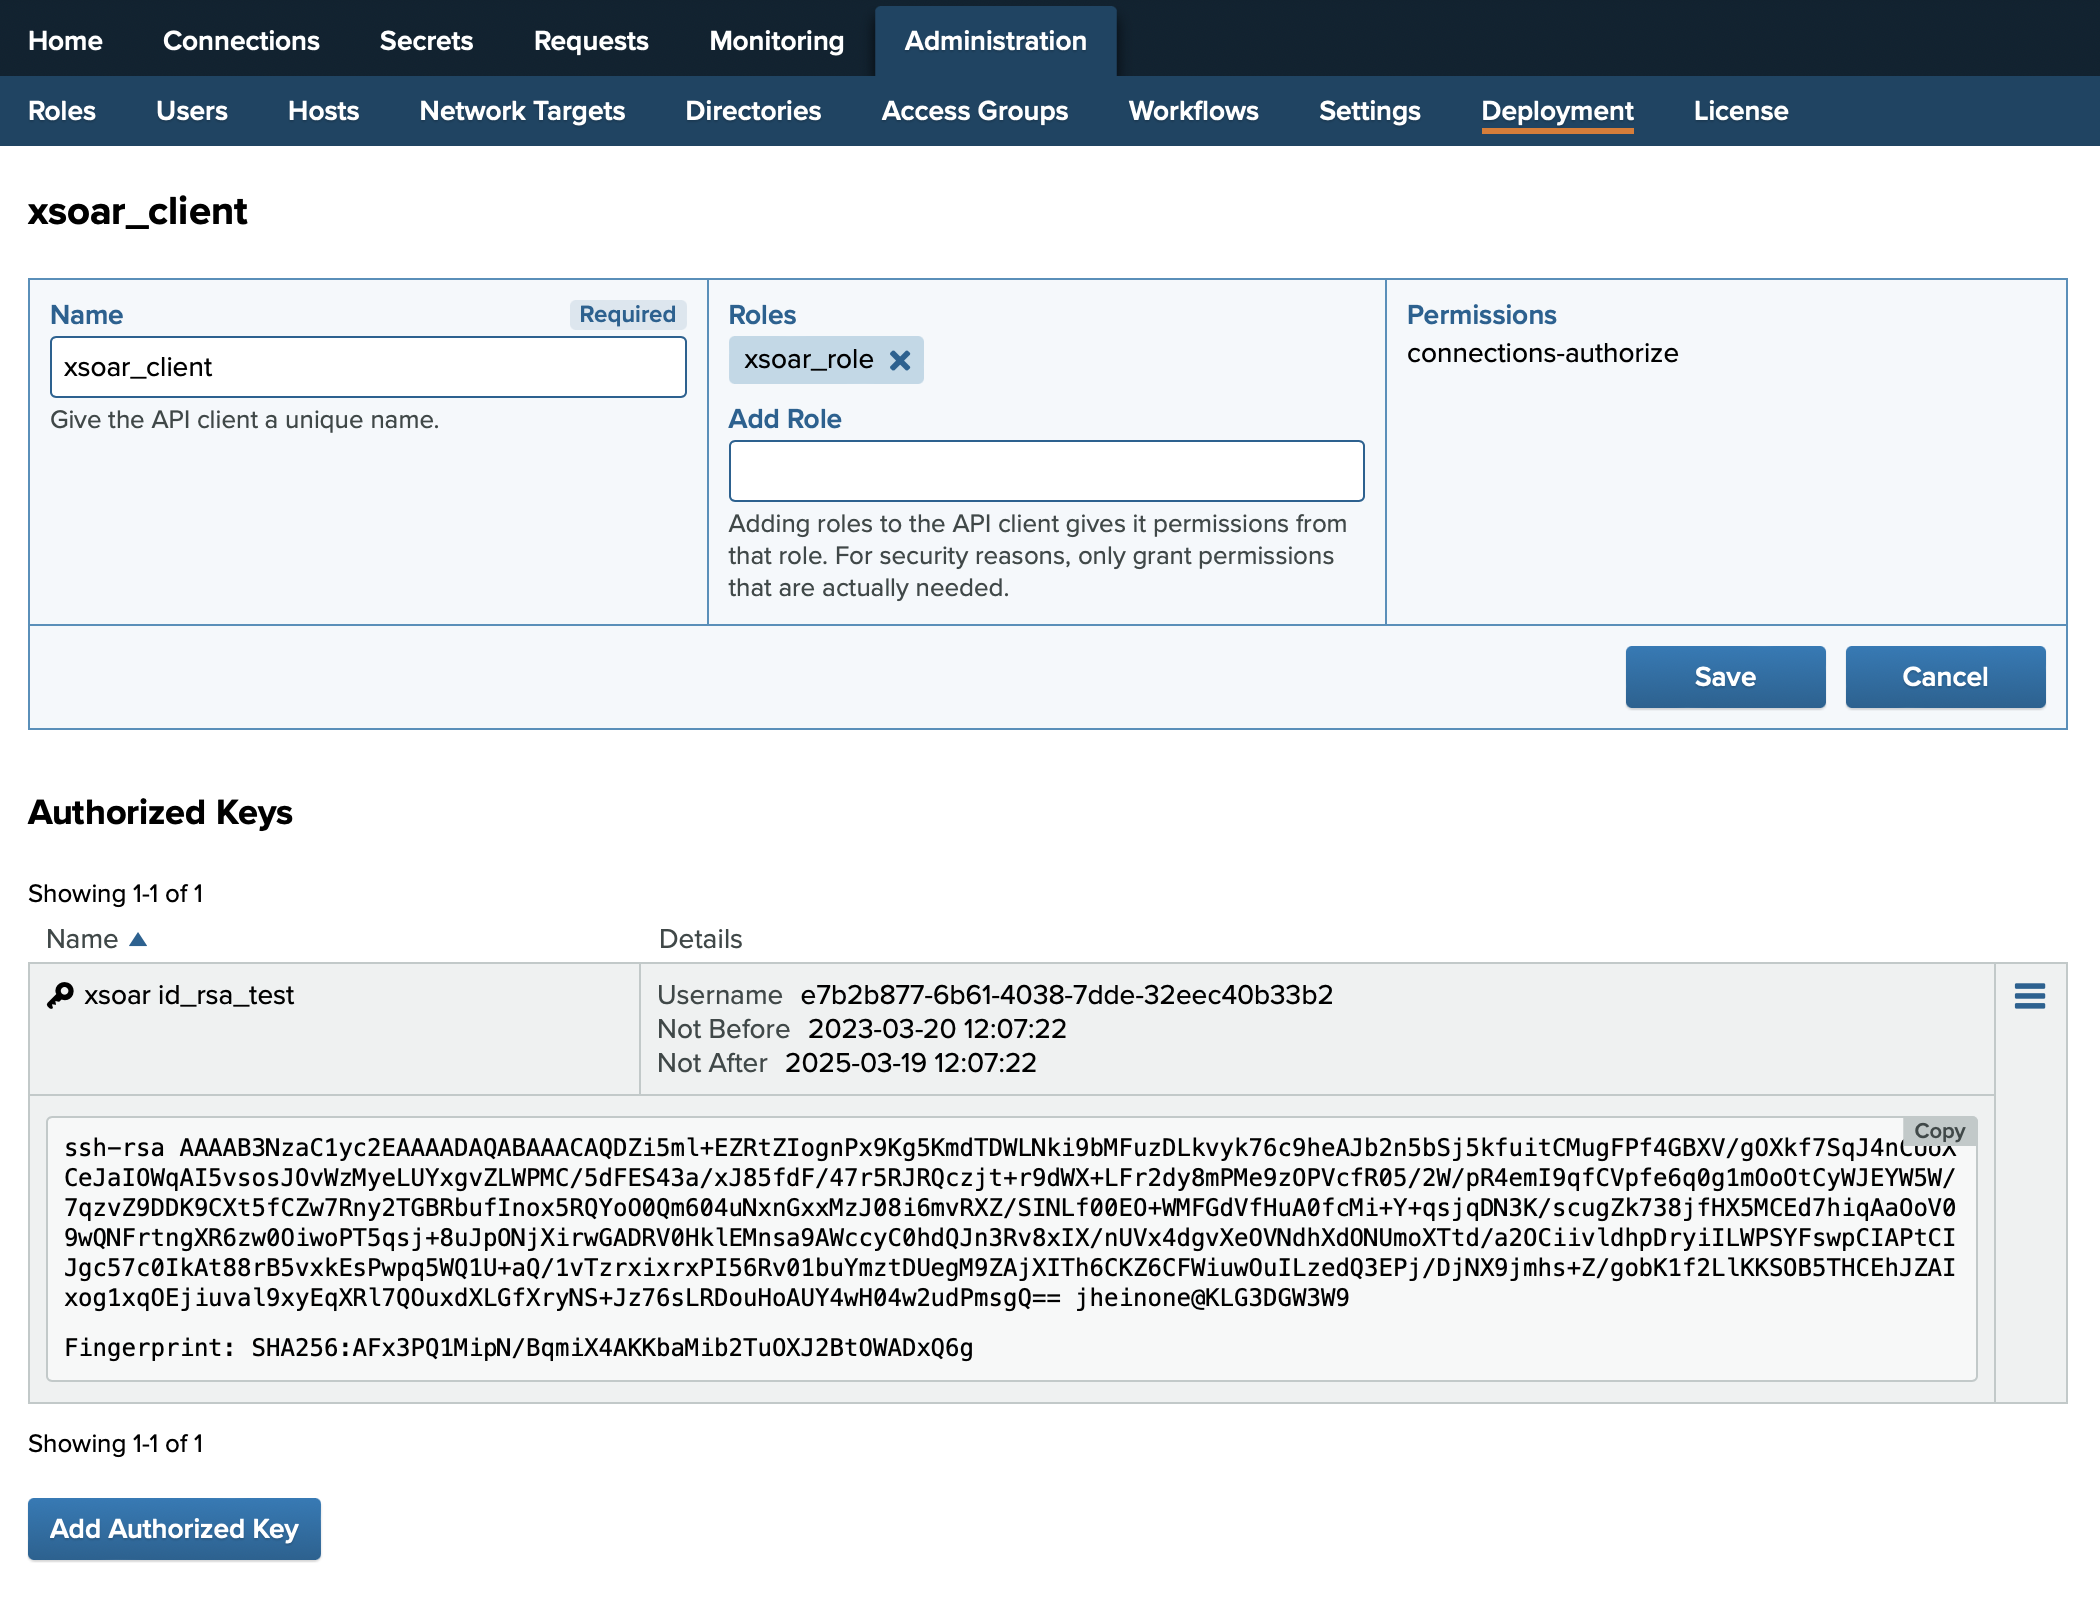
Create a new API Client in PrivX UI at Administration→Deployment→Integrate with PrivX Using API Clients.
Grant the previously created role to the API client so the API client receives connections-authorize permissions.
Also ensure that it has a role needed to access the desired account on the target host.
See API-Client Integration for more info.

-
Create an SSH key pair for which the ephemeral certificates are created. This is an example, you can use existing public key as well:
% ssh-keygen -t rsa -b 4096
Generating public/private rsa key pair.
Enter file in which to save the key (~/.ssh/id_rsa): id_rsa_test
Enter passphrase (empty for no passphrase):
Enter same passphrase again:
Your identification has been saved in id_rsa_test
Your public key has been saved in id_rsa_test.pub

% cat id_rsa_test.pub
ssh-rsa AAAAB3NzaC1yc2EA....GSCjSzEHDclQ== user@host -
Configure PrivX content pack with the following attributes:
Name Name for this integration Your PrivX server address (FQDN or IP) Your PrivX server instance address. If you are using a load balancer in front of your PrivX instances, this is the load balancer address. Your PrivX server HTTPS port HTTPS port of your PrivX endpoint. Default is 443. OAuth client ID PrivX API Client OAuth client ID. For the default installations, this should be always set to "privx-external", which identifies the client as API client. OAuth client secret PrivX API Client OAuth client secret. API client ID PrivX API Client ID API client secret PrivX API Client secret PrivX CA certificate TLS Trust Anchor from PrivX API Clients page. This is used to verify the identity of the PrivX server HTTPS endpoint. User's public key (optional) Public key is required for fetching SSH short term certificates with privx-get-cert command via PrivX API.
Copy the contents of the previously generated public key file id_rsa_test.pub here.
The public key can be configured here, or it can alternatively be passed as command line argument to privx-get-cert command. -
Click "Test" button in XSOAR integration page, you should receive "Success" message:

-
Now you're ready for testing the XSOAR commands:
!privx-get-cert username=xsoar hostname=10.1.12.15
!privx-get-cert username=xsoar hostname=10.1.12.15 service=SSH role-id=b4a9749e-bc9b-5e96-4c63-9bfd58b74e7b

!privx-get-secret name=the-secret
!privx-get-secret name=another-secret