
PrivX-Server Configuration
This article describes configurations for customising PrivX-server functionality.
Dedicated Server Roles
front end, back end, server_mode, worker-only, server-only, keyword test
You can dedicate individual PrivX servers in HA deployments to certain roles, which restricts the types of jobs they perform.
To set the server role of a PrivX server:
-
Access the PrivX server as
root. -
In the shared-configuration file
/opt/privx/etc/shared-config.toml, set theserver_modesetting:- default - All jobs
- worker-only - Back-end jobs
- server-only - Front-end jobs
| default | worker-only | server-only | |
| Handle user logins | • | • | |
| Cloud-host scans | • | • | |
| Check host availability | • | • | |
| Process audit logs and session recordings | • | • |
-
Restart PrivX services to apply your changes
systemctl restart privx
Note
The PrivX servers in your deployment must collectively be able to perform all jobs. At all times, ensure your PrivX deployment has at least:
- 1 or more
defaultservers.Or:
- 1 or more
worker-onlyservers, and- 1 or more
server-onlyservers.
PrivX Log Settings
By default, regular and audit events are logged to syslog. Audit events use the namespace SSH-PRIVX-AUDIT, and other (debug/info/warning/error) messages use the namespace SSH-PRIVX.
You can adjust the locations to which PrivX writes logs, and the log level of each microservice. The log locations are configured by settings in /opt/privx/etc/shared-config.toml.
# Should we send PrivX system events to logs under /var/log/privx
# send_regular_events_to_stdout = false
send_regular_events_to_stdout = false
# Should we send PrivX audit events to syslog
# send_regular_events_to_syslog = true
send_audit_events_to_syslog = true
# Should we send PrivX system events to syslog
# send_regular_events_to_syslog = true
send_regular_events_to_syslog = true
To enable debug output for a microservice:
-
Edit
/opt/privx/scripts/local-env. Here you can set the logging and trace level per microservice. The example will set Authorizer-microservice log level toDEBUGand trace to5:AUTHORIZER_LOG_LEVEL=DEBUG AUTHORIZER_TRACE=5After editing the
/opt/privx/scripts/local-envthe microservice(s) needs to be restarted to apply the changes. In this example only Authorizer restart is needed.# systemctl restart authorizerAlternatively, restart all PrivX services to apply configuration changes to all microservices.
# systemctl restart privx -
By default, the system-logging service rsyslog is configured to show INFO-level messages only, which blocks DEBUG messages. To configure rsyslog to show DEBUG-level messages, find the following line in the rsyslog configuration file,
/etc/rsyslog.conf:*.info;mail.none;authpriv.none;cron.none /var/log/messagesAnd change it to, for example:
*.debug;mail.none;authpriv.none;cron.none /var/log/messagesRestart rsyslog to apply the changes:
# systemctl restart rsyslog
Custom Instance Names
You can set a custom instance name to better distinguish between multiple PrivX servers. Custom instance names are displayed in the PrivX GUI, and added to the audit events generated from the server.
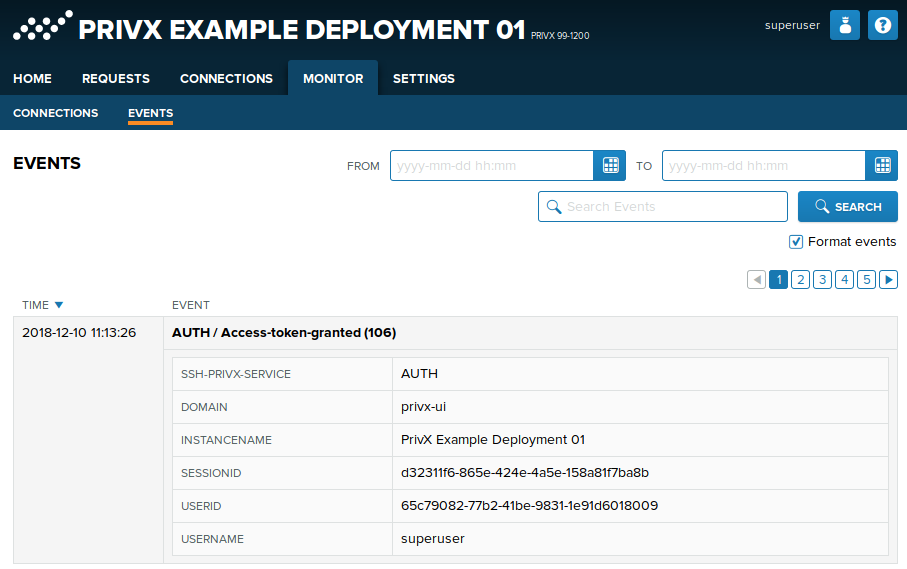
To set a custom instance name for a PrivX server:
-
Gain root-terminal access to the PrivX server.
-
Edit the shared configuration at
/opt/privx/etc/shared-config.toml. In this file, set the custom instance name withprivx_instance_name. For example:# A custom PrivX instance name to be shown in the header privx_instance_name = "PrivX Example Deployment 01"Save your changes to the file.
-
Restart the PrivX services to apply the changes:
# systemctl restart privx
Custom Disclaimers

To show messages to PrivX users upon login:
-
On the Administration→Settings page, click Edit. Set the Disclaimers settings in JSON format, similar to the following:
[
{
 "id": "terms-and-conditions",
 "timeStamp": "2020-01-01T12:00:00Z",
 "path": "^/auth/login$",
 "title": "Terms and Conditions",
 "text": "Lorem ipsum dolor sit amet.",
 "accept": "I have read and agree to the terms and conditions",
 "mode": "popup",
 "acceptable": true,
 "closeable": false,
 "expirationTime": 24,
 "expireAtLogin": false
}
]
You can customize the disclaimer content and visibility with the following parameters:
-
id: Unique identifier to keep track of disclaimer acceptance in case multiple disclaimers are used.
-
timeStamp: The date and time the disclaimer was created or updated. Uses ISO-8601 format, e.g.
2020-01-01T12:00:00Z.When the timeStamp is updated the disclaimer will be treated as new and users will see it again even if they previously accepted the disclaimer.
-
path: Optional regular expression that limits the disclaimer to only portions of the PrivX UI, such as the login page.
-
title: Title for the disclaimer.
-
text: Message shown in the disclaimer.
-
accept: Text for the checkbox that allows users to accept the disclaimer.
-
mode: How the disclaimer looks on the page. Can be
float,local, orpopup. -
acceptable: Allow users to accept and close the disclaimer. Can be
true orfalse.After a user accepts the disclaimer it will not be displayed on subsequent logins, until users clear browser local storage. Unless closeable is also set to true, the user must accept the disclaimer to proceed.
-
closeable: Allow users to close the disclaimer without accepting it. Can be
true orfalse. -
expirationTime: Optional expiration time for user dismissals of the disclaimer (in hours).
The disclaimer will re-appear after the specified amount of time has elapsed after a user has dismissed the disclaimer.
-
expireAtLogin: Allows the user's dismissal of the disclaimer to expire at the next login. Can be
true orfalse.
-
-
Restart PrivX services to apply the changes:
# systemctl restart privx
Or click Restart button on Administration→Settings.
Resetting the Superuser Password
If you have forgotten your local PrivX superuser's password, you can reset it as follows:
-
Access your PrivX server as
root. In HA deployments you can perform the commands on one of your PrivX servers. -
On a PrivX server, obtain an hashed version of your new password (replace
<example_password> with your new password):# /opt/privx/bin/keyvault-tool bcrypt <example_password> -
Access the PrivX database using psql with write permissions. Change the superuser password (Replace
password_hash andsuperuser with the hashed password and your superuser-account name respectively):# UPDATE localuser SET password='password_hash' WHERE username='superuser'You can now log into PrivX as superuser using the new password.
Resetting PrivX-Server Settings
To reset some or all PrivX settings to default values:
-
Back up PrivX settings as JSON by running the following on one of your PrivX servers:
i. Export settings as a JSON:
# /opt/privx/bin/settings-tool -command=export -out <filename.json>ii. If you later need to revert to previous settings:
# /opt/privx/bin/settings-tool -command=import -in <filename.json>Caution
Only restore settings to the same PrivX version that you took the backups from. Restoring settings to a different PrivX version may break the system.
Caution
Only restore settings to the same PrivX version that you took the backups from. Restoring settings to a different PrivX version may break the system.
-
Use the
settings-toolon one of your PrivX servers to reset PrivX settings:-
To reset all the settings:
# /opt/privx/bin/settings-tool -command=reset -
To reset the settings in a specific scope:
# /opt/privx/bin/settings-tool -command=reset -scope=<scope> -
To reset the settings in a specific section in a scope
# /opt/privx/bin/settings-tool -command=reset -scope=<scope> -section=<section>For more information about the available scopes and sections, see PrivX Settings.
-
-
On all of your PrivX servers, restart PrivX to apply the changes:
# systemctl restart privx
SSH Product Integrations
PrivX can have predefined links for switching between different SSH products. These links are shown to administrators on the right-hand corner of the header bar.
To configure links:
-
On the Administration→Settings page, click Edit. Edit the SSH Product Integrations for different products. At the moment there is a configuration for SSH Universal Key Manager, the value must be a valid URL.
-
Restart PrivX services to apply the changes. To do this, click Restart.
To access your applications, click  on the right-hand corner of the header bar.
Changing Bastion Ports
By default, SSH Bastion and RDP Bastion are under ports 2222 and 3389 respectively. You may assign Bastion services under other ports, the high-level steps include:
- Updating port settings under PrivX configuration.
- Updating firewall settings to accommodate the new port.
Changing SSH-Bastion Port
To change the SSH-Bastion Port, perform the following on all your PrivX Servers:
-
In the configuration file
/opt/privx/etc/ssh-mitm.toml, modifyssh_listen_addressto include your new port. For example, to change the port to 8022, change the setting to:ssh_listen_addresses = [ ":8022" ]Save your changes to the file.
-
Allow the new port in firewall settings (replace
8022with your new port number):sudo firewall-cmd --permanent --zone=public --add-port=8022/tcpYou should also block the old, unused SSH-Bastion port (replace
2222with your old port number):sudo firewall-cmd --permanent --zone=public --remove-port=2222/tcpApply your firewall changes:
sudo firewall-cmd --reload -
Finally, restart PrivX:
sudo systemctl restart privxYou should now be able to establish SSH connections via the new SSH Bastion port.
Changing RDP-Bastion Port
To change the RDP-Bastion Port, perform the following on all your PrivX Servers:
-
In the configuration file
/opt/privx/etc/rdpmitm/rdpproxy.ini, under the[globals]section, add aportsetting. For example, to change the port to 3999 add a line like the following:port=3999Save your changes to the file.
-
Allow the new port in firewall settings (replace
3999with your new port number):sudo firewall-cmd --permanent --zone=public --add-port=3999/tcpYou should also block the old, unused SSH-Bastion port (replace
3389with your old port number):sudo firewall-cmd --permanent --zone=public --remove-port=3389/tcpApply your firewall changes:
sudo firewall-cmd --reload -
Finally, restart PrivX:
sudo systemctl restart privx
Updated over 2 years ago