Microsoft Entra ID as a User Directory via LDAPS
This document provides instructions for adding Microsoft Entra ID users to PrivX. Once configured, Entra ID users can log into PrivX and be granted SSH/RDP access similarly to regular Active Directory users.
These instructions apply to Azure environments with LDAPS support. For environments without LDAPS, see Microsoft Entra ID as a User Directory via Microsoft Graph API.
Disclaimer
This document contains general guidance for configuring third-party products from Microsoft. Its instructions were verified with the Microsoft Azure version current as of January 2024 and may require adjustments for other versions.
SSH Communications Security Corporation makes no warranties regarding the accuracy, reliability, or continued relevance of these instructions, and does not offer support for third-party products.
For accurate setup and usage, refer to the official Microsoft documentation or contact Microsoft support. You are responsible for defining your final production setup for Microsoft products.
Prerequisites
Before the Entra ID integration, check the following:
- Your Entra ID contains the users that are to access PrivX.
- LDAPS is enabled in your Entra domain.
- For more information on this, see Tutorial: Configure secure LDAP for a Microsoft Entra Domain Services managed domain
- You have the following bind data from your Entra ID (To allow PrivX to detect users on Entra ID):
- Bind-user credentials (distinguished name and password).
- Base DN for user search.
- LDAP name containing the users' login names (typically
userPrincipalName).
- You have the following data from your Entra deployment (needed for PrivX server configuration):
- Root CA certificate of your Entra domain (in PEM or DER format).
- Your Entra-ID public URL.
- The Directory ID of your Entra ID.
- You have access to your Azure Portal with sufficient permissions for app registration.
- You can perform terminal commands as root on your PrivX servers.
- You have access to the PrivX GUI as a privx-admin.
Integration Steps
The high-level workflow for allowing Entra ID users to log into PrivX involves:
- Registering PrivX as an application in Entra ID.
- Adding Entra ID users to PrivX.
These steps are detailed in the following sections.
Registering PrivX in Entra ID
Entra ID users use the Microsoft login for PrivX authentication. To enable this functionality, you must first register PrivX as an app in Azure:
-
Log into the Azure Portal at https://portal.azure.com/ — ensure you are logged into the correct directory.
-
To create a new app, navigate to Microsoft Entra ID→App registrations, and click New registration.
-
Provide the required information about the PrivX app, then click Register:
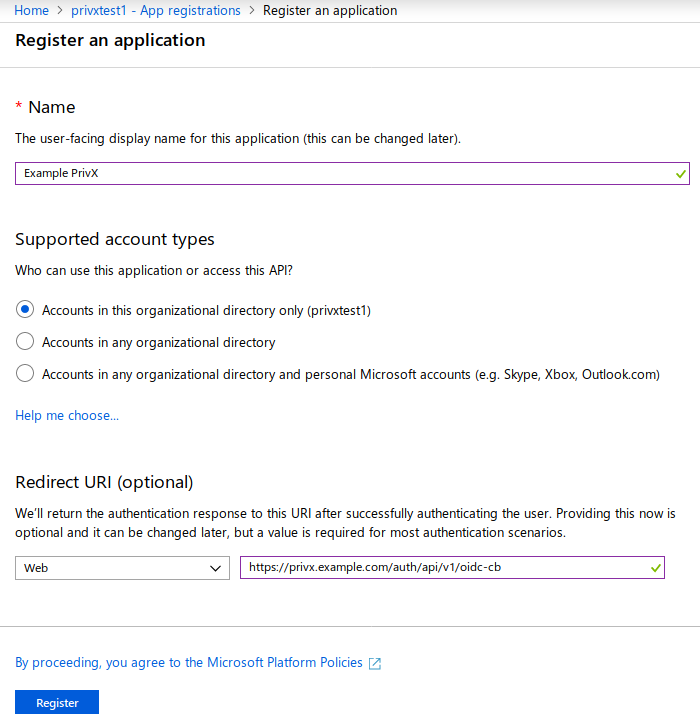 info
infoThe Redirect URIs must contain a Web address with the format
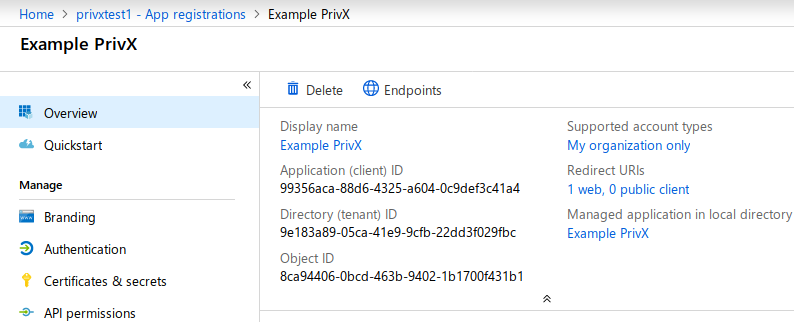
https://privx.example.com/auth/api/v1/oidc-cb(replaceprivx.example.comwith your PrivX server address).You should now be able to see the details of your app. Make note of the Application ID and the Directory ID, which are later required for PrivX configuration:
-
Next, create an authentication key for the PrivX app by selecting Certificates & Secrets, then New Client Secret.
- Enter the details for your key, then click Save.
- Copy the key Value, which is later required for PrivX configuration.
After completing these steps, the PrivX app should be set up.
Adding Entra ID Users to PrivX
To allow LDAPS connections to Entra ID, the root-CA certificate of your Entra domain must be added as a trusted Certificate Authority (trusted CA). To do this, perform the following on each PrivX server:
- Gain root-terminal access to your PrivX server.
- Copy the root-CA certificate
After you have set up the root-CA certificate, configure PrivX to import users from Entra ID, and to authenticate Entra-ID users using Microsoft login:
-
Access the PrivX GUI.
-
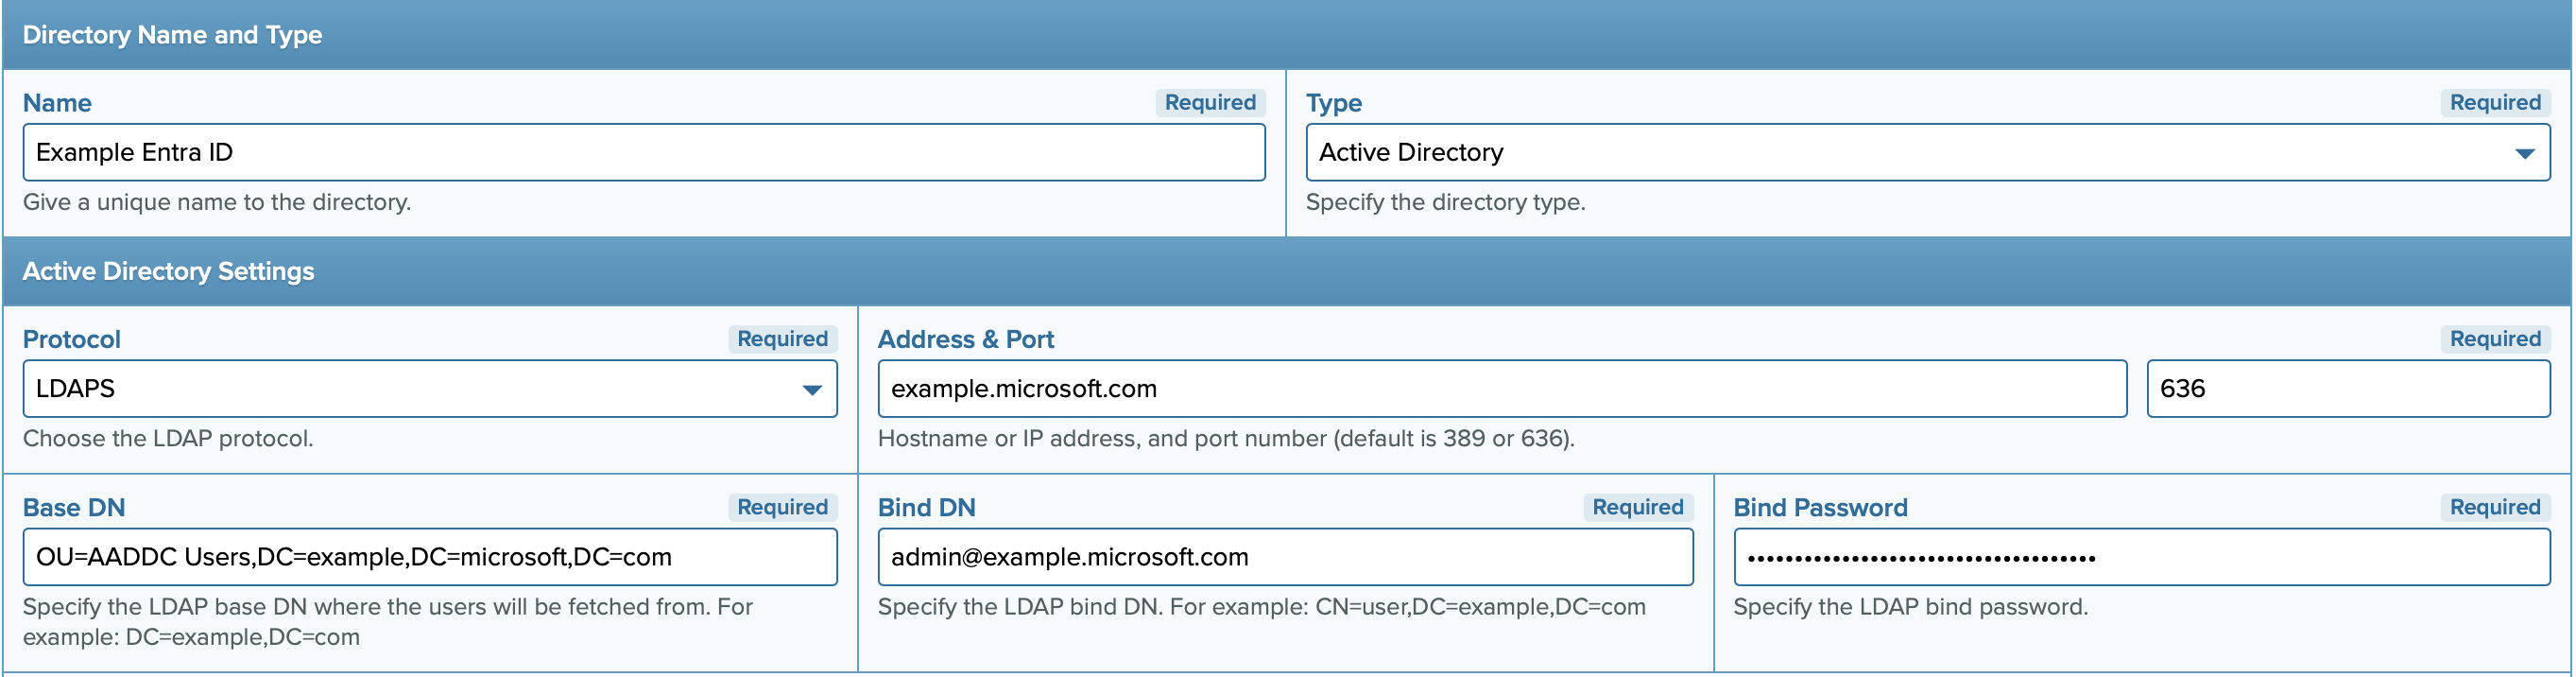
Go to Administration→Directories and click Add Directory.
Add a directory of type Active Directory and set the connection protocol to LDAPS. Then, provide the other required Active Directory Settings as follows:
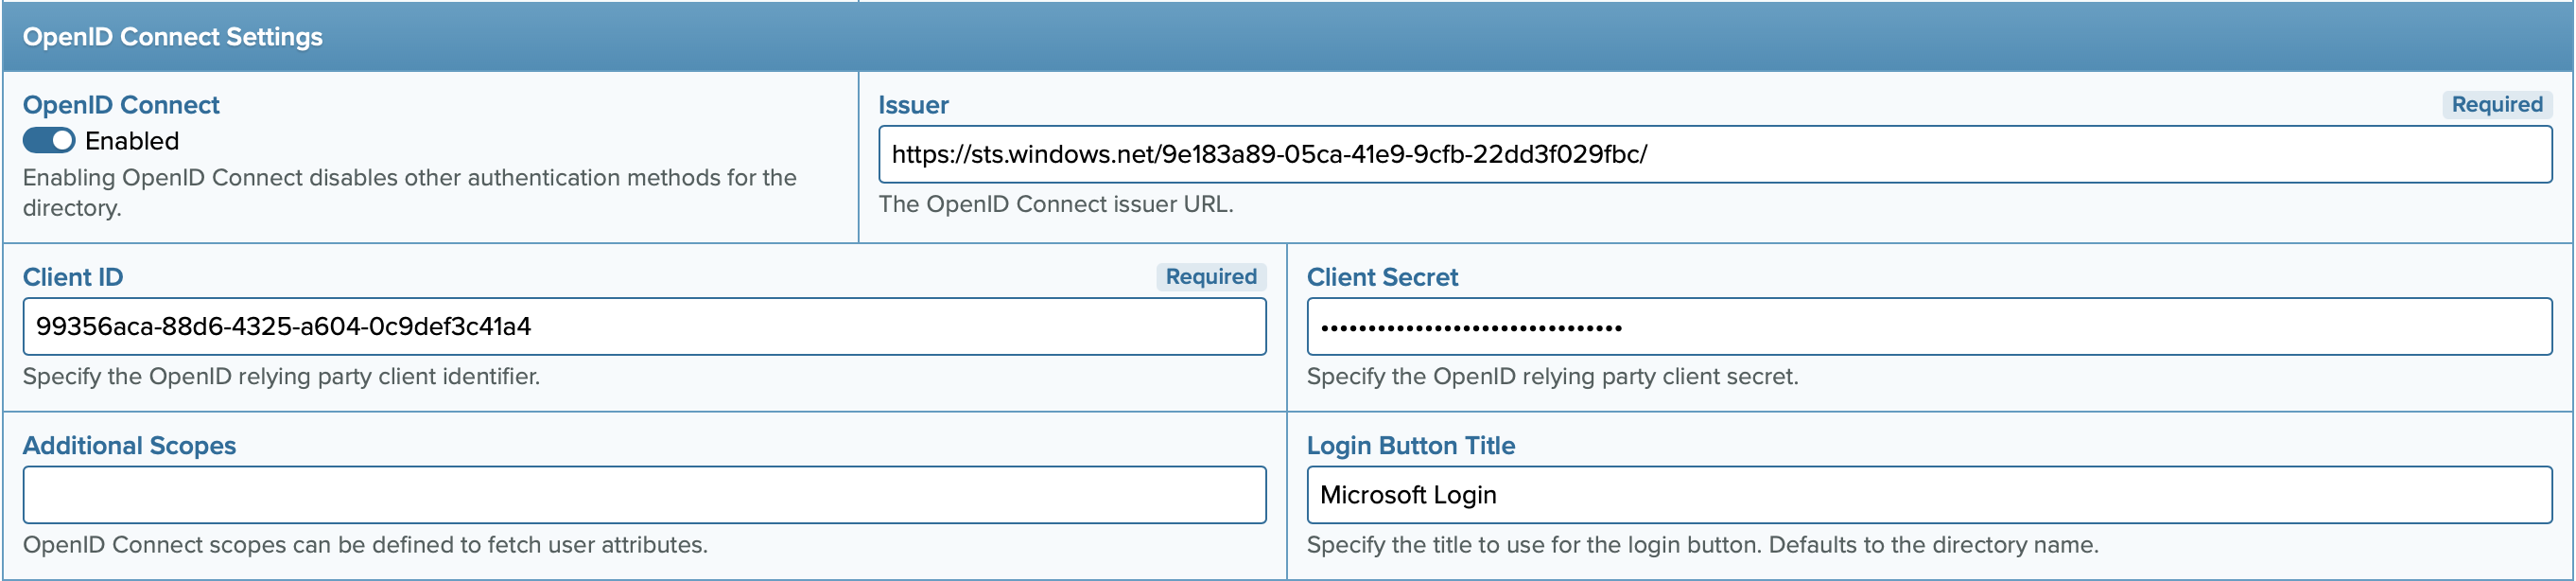
To enable Microsoft login (using the OpenID Connect standard), also provide the following OpenID Connect Settings:
- OpenID Connect: Set to Enabled.
- Issuer: OIDC Issuer URL, typically following the syntax
https://sts.windows.net/<Directory_ID>/(replace<Directory_ID>with your Entra ID Directory ID). - Login Button Title: Name for the login button displayed on the PrivX login page.
- Client ID: PrivX app application ID.
- Client Secret: The value of the key for your PrivX app.
-
Click Save to apply your changes and verify the directory status back on the Administration→Directories page.
It can take a while for PrivX to fetch and display the directory status. It should display one or more users after that.
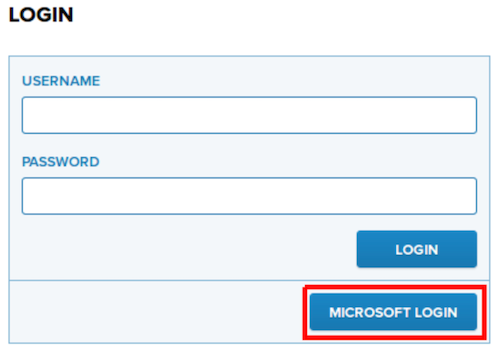
Verifying integration
You may verify integration by testing login with one of the Entra ID users:
-
Log out from PrivX (if logged in) and navigate to the login page.
-
Click the login button for your Entra ID — for example, Microsoft Login.
-
Sign in with your Entra ID credentials.

-
After a successful login, you should be granted access to PrivX. Integration is now complete.