
Importing Users and Hosts
Instead of manually adding users and target hosts to PrivX, you can import them from your existing directories. Here we provide examples for importing users from AD, and hosts from AWS.
Importing Users from Active Directory
You can set up PrivX to automatically add users from user directories. Such users can then be given access to hosts via PrivX.
For example, to add Active Directory (AD) users:
-
Configure PrivX to scan the AD server for users. To do this, log into PrivX as superuser (or other privx-admin user). Then on the Administration→Directories page, click Add Directory.
-
Provide the required AD settings.
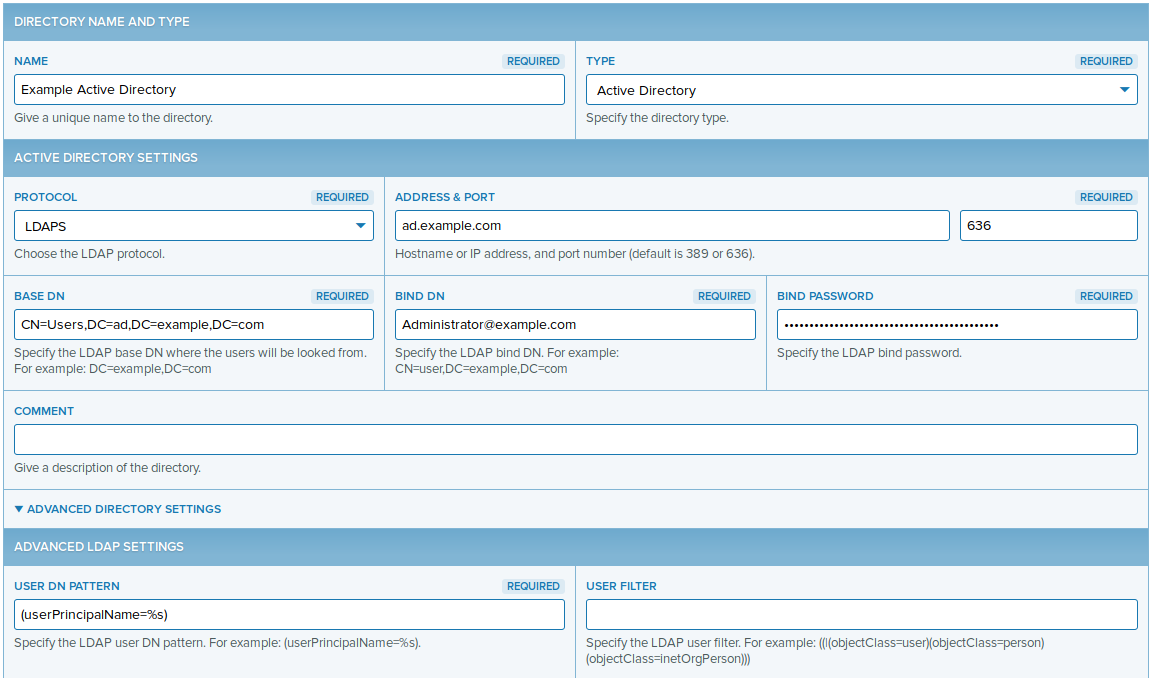
Note
%s in the User DN pattern stands for the user name by which AD users may log into PrivX. For example assume there is an AD user with the following fields:sAMAccountName:
alice
userPrincipalName:[email protected]In this case, if User DN pattern were set to (sAMAccountName=%s), the user can log in with the user name
alice. If User DN pattern were set to (userPrincipalName=%s), the user can log in with the user name [email protected].Save the directory settings. PrivX automatically connects to the AD server to add any users found with the given settings.
-
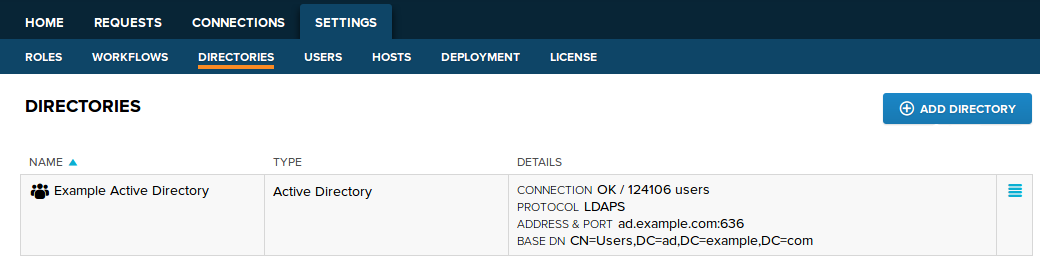
You may verify the AD status back on the Administration→Directories page. After PrivX finishes adding users from the AD, the connection status should display OK, along with the number of users added.
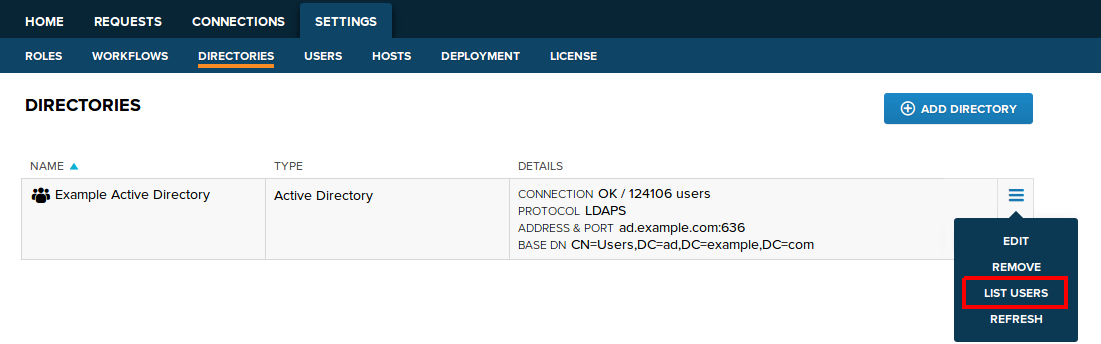
To list the users added from the AD, perform a List Users action on the AD entry.
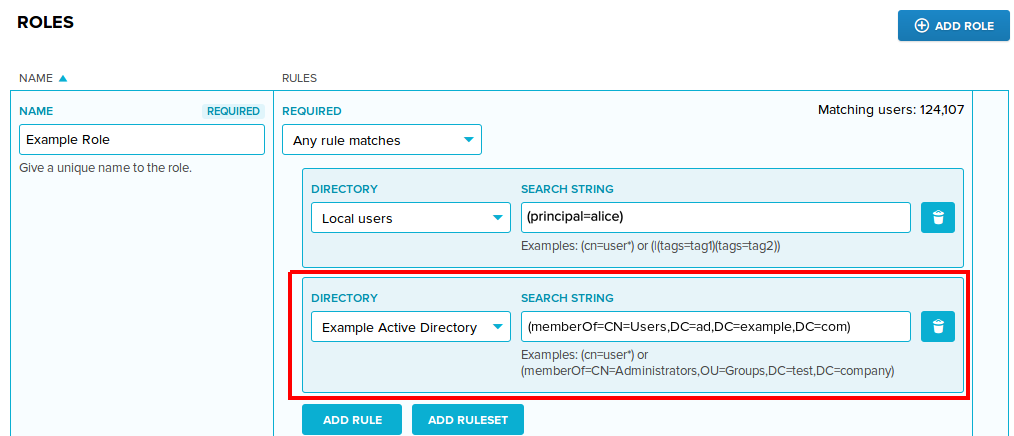
To grant AD users access to hosts and services, add them to roles. For example, you can add an additional rule to the Example Role that was created earlier.
AD users may then log into the PrivX GUI and establish SSH/RDP connections. The allowed connection targets are determined by the role(s) assigned to the AD users.
Importing Hosts from AWS
You can set up PrivX to automatically add existing hosts from cloud platforms. Such hosts can later be connected to via PrivX.
For example, to add hosts from Amazon Web Services (AWS):
-
In your AWS, add a policy to allow host scans. To do this, access your AWS and navigate to IAM→Policies, then create a policy with the following JSON:
{ "Version": "2012-10-17", "Statement": [ { "Effect": "Allow", "Action": "ec2:Describe*", "Resource": "*" } ] } -
Create an IAM user with permissions to use the host-scan policy. This can be done on the IAM→Users page.
The IAM user must have Programmatic access, and be attached with the host-scan policy.
Note the Access key ID and the Secret access key of the user. These are required later for configuring PrivX against AWS.
-
Configure PrivX to scan and add the AWS hosts.
Log into PrivX as superuser (or other privx-admin user). On the Administration→Directories page, click Add Directory.
Fill in the basic information of the directory. To allow PrivX to detect AWS hosts, add the Access key ID and the Secret access key of the IAM user.
You can selectively filter hosts using the Fetch hosts with tag option found under the Advanced directory settings.
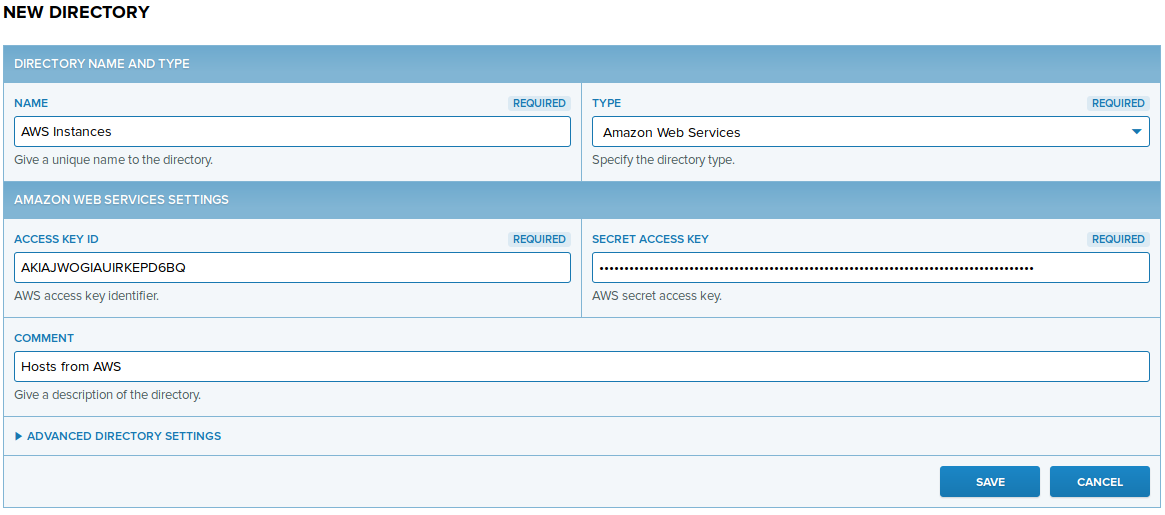
Save the directory settings. PrivX begins importing hosts from AWS.
After a moment, you may verify the directory status back on the Administration→Directories page. The Connection should be in the OK state, and list the number of instances found on AWS.

To list the imported hosts, click List Hosts.

You may then Edit hosts to add services and account mappings to them, similarly as in Adding Hosts Manually.
For using AWS role federation features, see Configuring ephemeral credential access for AWS API
Updated over 1 year ago