Google Cloud Platform as Host Directory
You can add Google Cloud Platform (GCP) as a host directory to import GCP instances into PrivX and provide access to them.
This article includes instructions for configuring third-party Google products, including GCP roles and service accounts.
SSH Communications Security does not provide warranties, support, or other services for third-party products from Google LLC.
Google LLC may change its products and user interface independently. If the third-party configuration steps differ, refer to the official Google Cloud documentation.
To configure the integration:
- Create a custom GCP role with the permissions required to view instances. The custom role limits PrivX to the permissions required for importing host information.
- Create a service account and assign the custom role to it. The service account provides PrivX with an identity for accessing the GCP project.
- Create a JSON key for the service account. PrivX uses the key to authenticate to Google Cloud.
- Add a GCP host directory to PrivX using the project ID and service-account key. The project ID identifies the source project, and the key authorizes PrivX to import its instances.
- Configure services and accounts for the imported instances. These settings determine how PrivX users can access the instances. Skip this step if PrivX imports the required access definitions from host tags stored in the VM metadata.
Prerequisites
Before you begin, ensure that you have:
- A Google Cloud project containing the instances to import into PrivX.
- Administrative access to the Google Cloud project.
- Superuser access to PrivX.
Configuring Google Cloud Service Account
PrivX uses a Google Cloud service account to get information about your GCP instances. Create a custom role with the required permissions, assign the role to a service account, and create a JSON key for the service account.
Creating Custom Role
Create a custom GCP role with the permissions required for importing instances:
-
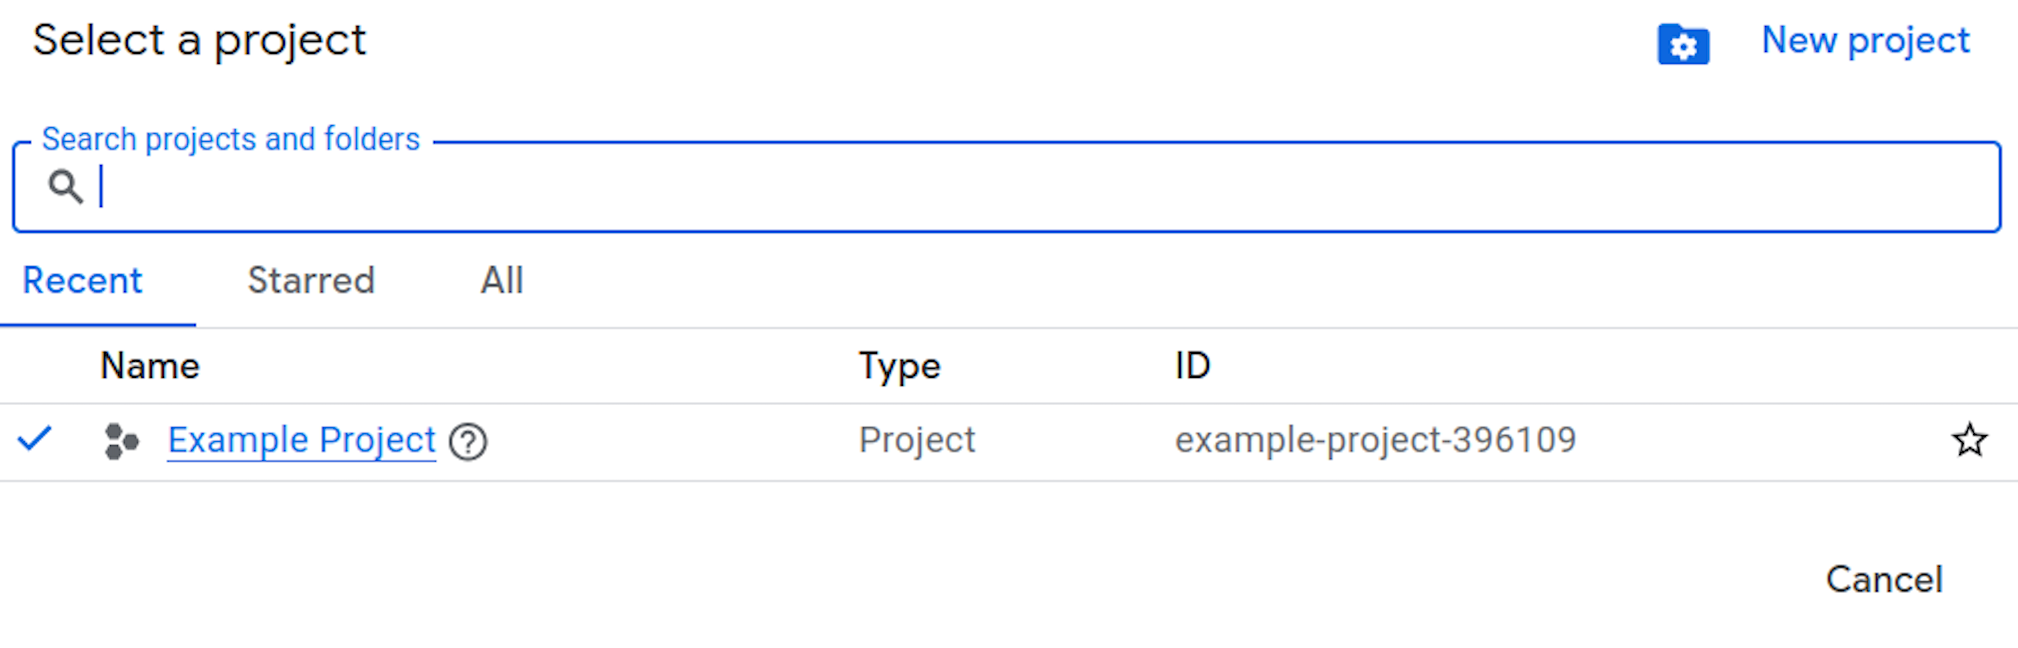
Sign in to the Google Cloud console and select the GCP project with the instances that you want to import. Remember the project ID, as you need it later when configuring PrivX.
-
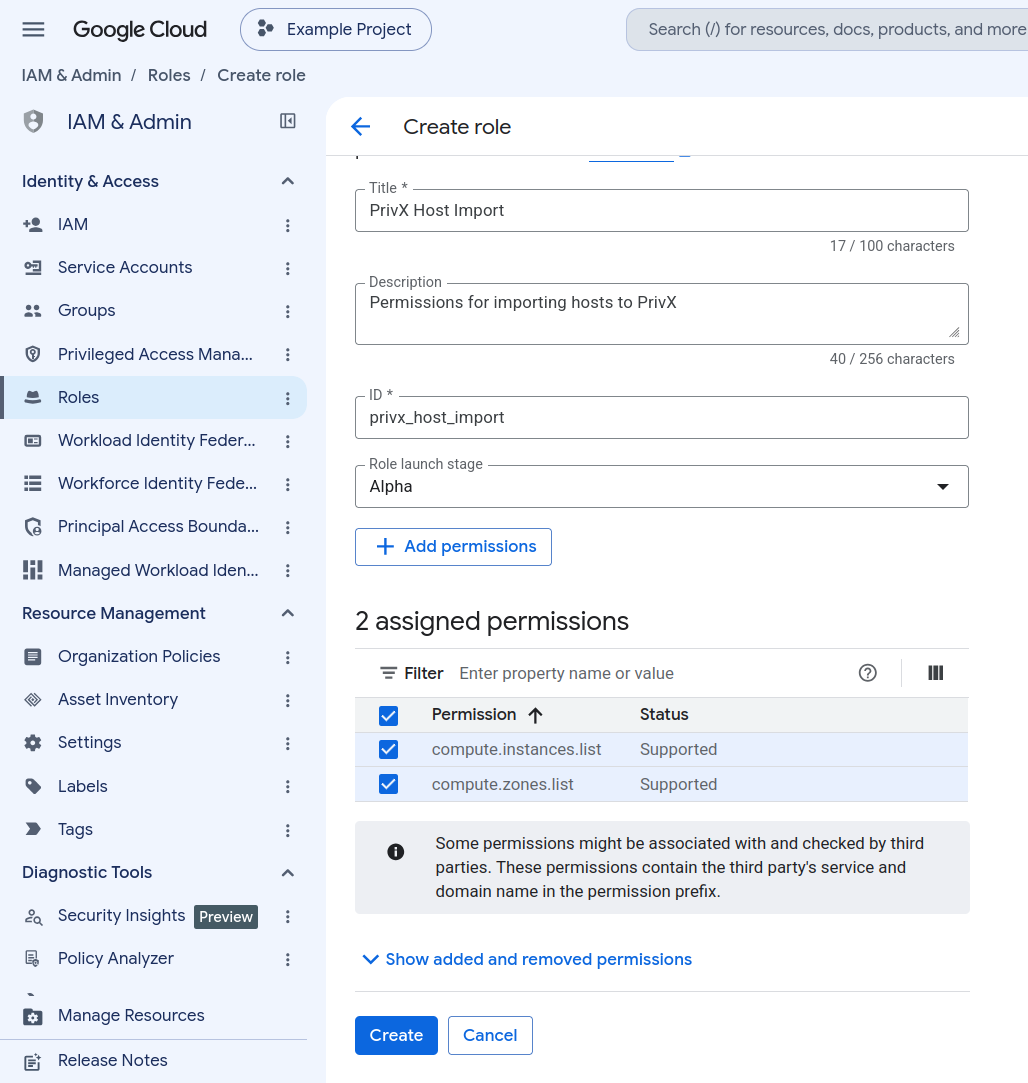
In IAM & Admin → Roles, click Create custom role and provide the role details, including its title, description, ID, and role launch stage.
-
Click Add Permissions and add
compute.instances.listandcompute.zones.list.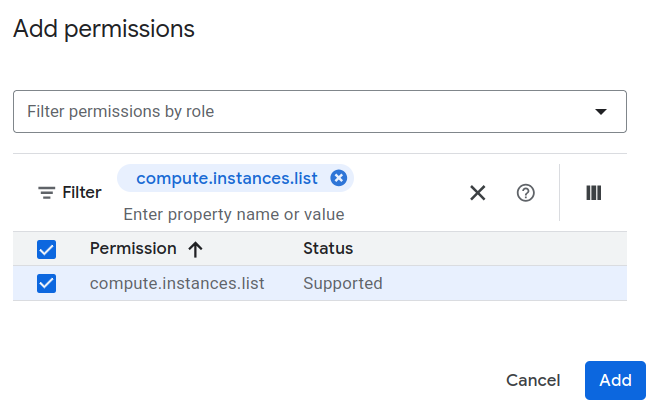
-
After adding permissions, click Create.
Creating Service Account
To create a service account and assign the custom role:
- On IAM & Admin → Service Accounts, click Create service account.
- Provide a name and description for the service account, and then click Create and continue.
- Under Grant this service account access to project, select the custom role that you created earlier.
- Click Continue, and then Done to finish the configuration.
Alternatively, if you did not assign the custom role while creating the service account:
- On IAM & Admin → Service Accounts, click the email address of the service account.
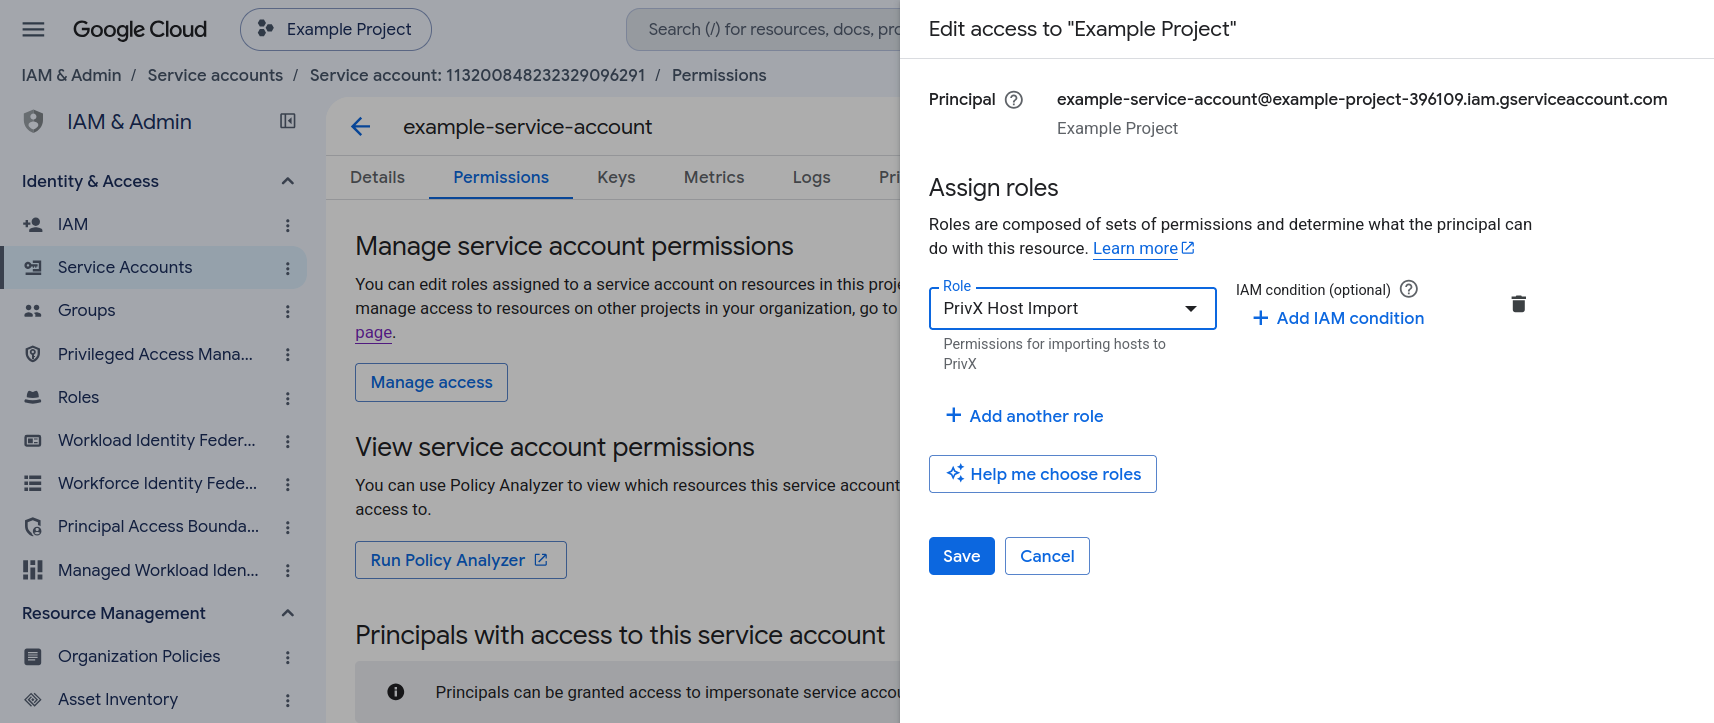
- On Permissions → Manage service account permissions, click Manage access.
- Under Assign roles, select the custom role that you created earlier, and then click Save.
Creating JSON Key
PrivX supports only service-account credentials in JSON format for Google Cloud host directories. Other Google credential JSON types are not supported.
To create a service-account key in JSON format:
-
In IAM & Admin → Service Accounts, click the email address of the service account.
-
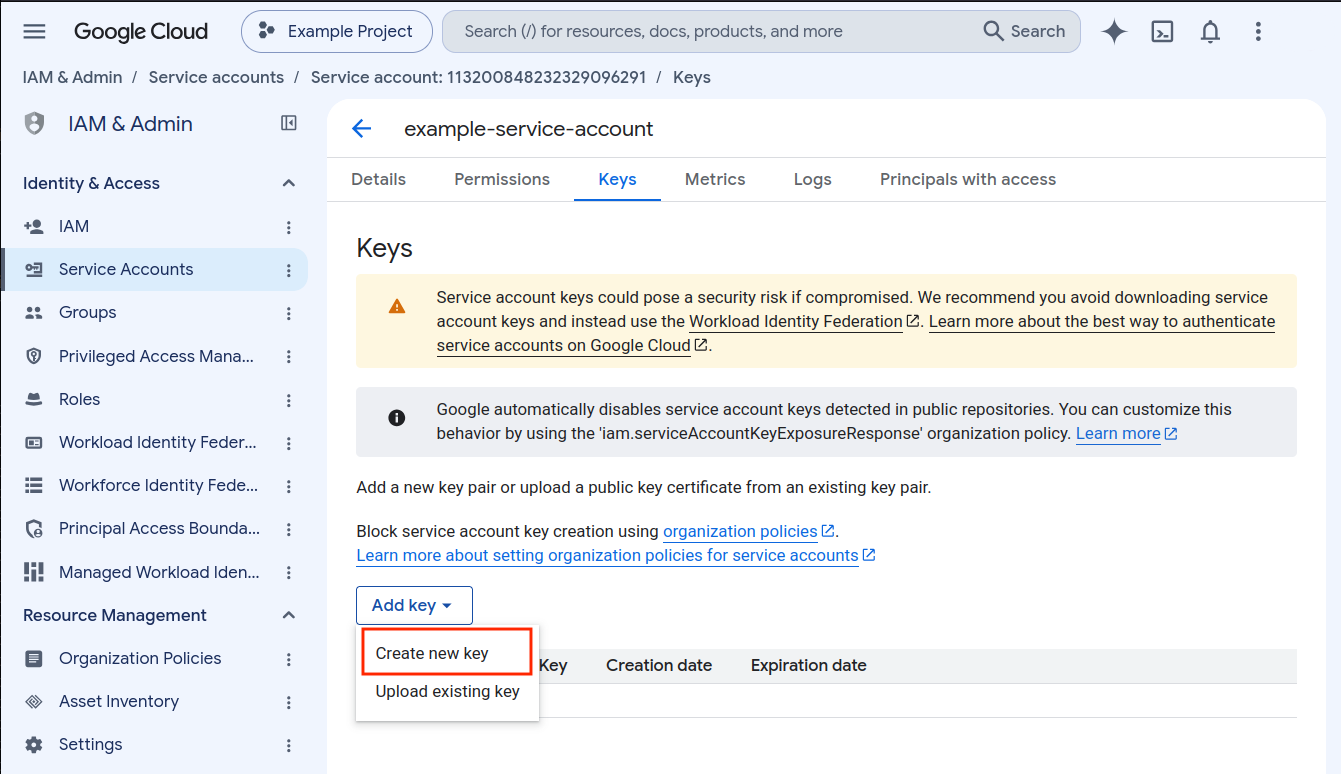
In the opened Keys tab, click Add key → Create new key.
-
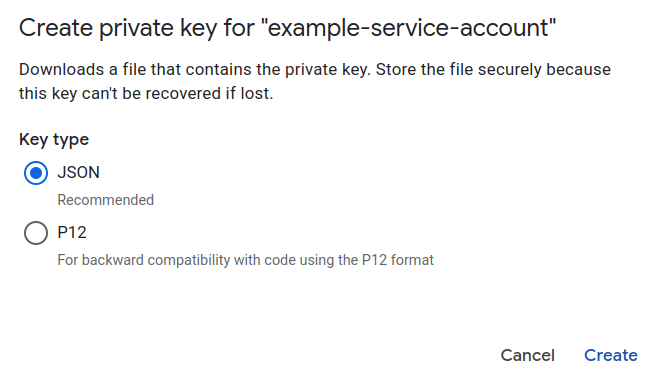
Select JSON and click Create. Google Cloud downloads the JSON key to your computer.
importantStore the key securely, as it contains the private credentials that PrivX uses to access the GCP project.
Adding GCP Host Directory to PrivX
After creating the Google Cloud service account and its JSON key, configure PrivX to use these credentials to import instances from your GCP project:
-
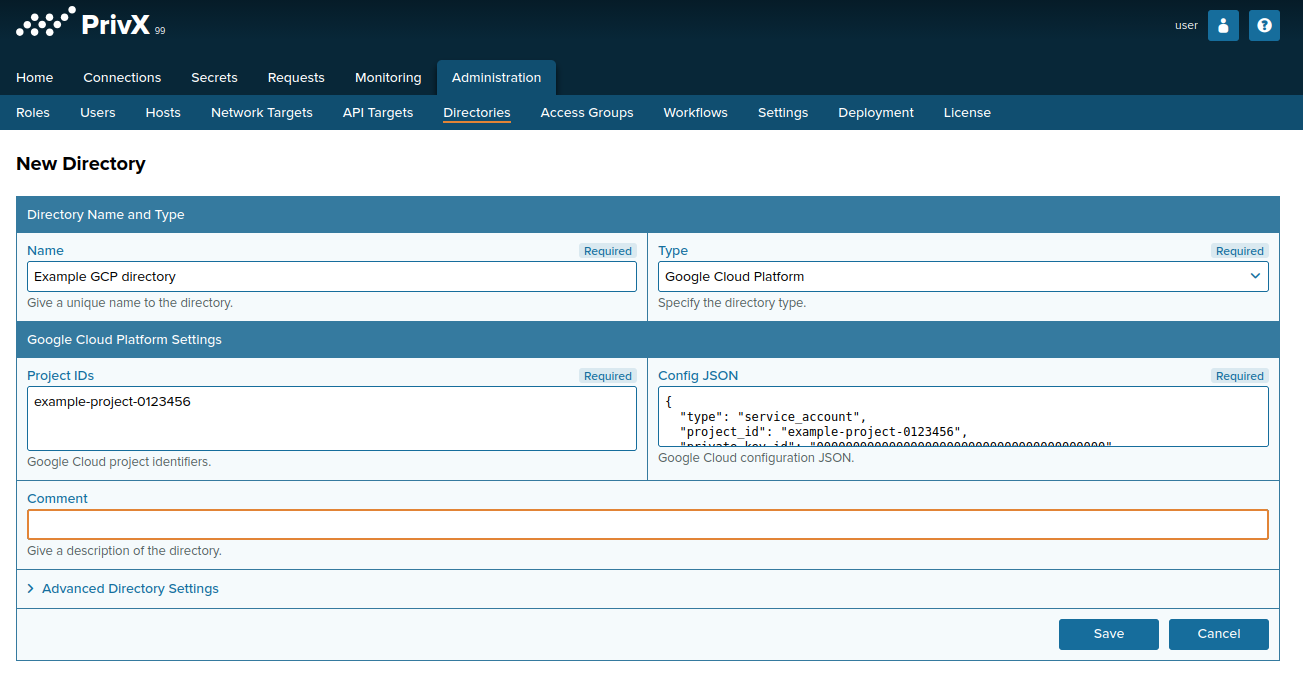
In the PrivX Web UI Administration → Directories, click Add Directory.
-
Configure the directory:
- In Name, enter a unique name for the directory.
- Set Type to Google Cloud Platform.
- In Project IDs, enter the ID of your GCP project from Creating Custom Role.
- In Config JSON, paste the contents of the service-account JSON key created earlier.
- To import access settings with the GCP instances, add PrivX host tags to their VM metadata before saving the directory, and enable Import host instance tags from the directory under Advanced Directory Settings. PrivX reads these tags from VM metadata, not from Google Cloud network tags. If you do not use PrivX host tags, configure access after the instances are imported, as described in Configuring Access to Imported GCP Instances.
-
Click Save.
PrivX creates the host directory and imports instances from the specified GCP projects. The directory appears in Administration → Directories. After the import finishes, the directory status changes to OK.
Configuring Access to Imported GCP Instances
After importing the GCP instances, verify that each instance has the required connection services and target accounts. If PrivX imported access settings from host tags in VM metadata, review the imported configuration. Otherwise, add the services and accounts manually.
To verify the access configuration:
- In PrivX Web UI Administration → Hosts, select an imported GCP instance and click Edit.
- Under Services, review or add the required connection services, such as SSH or RDP, and configure their addresses and ports.
- Under Accounts, review or add the target accounts and specify which PrivX roles can use them.
- Click Save.
For more information, see Setting Up Hosts.