Upgrading PrivX
Upgrade your PrivX deployment by updating the PrivX Servers and database before upgrading optional components, such as Extenders, Carriers, and Web Proxies. The upgrade procedure depends on whether you use a single-server or high-availability deployment. Upgrade Carriers and Web Proxies together.
To prepare Extender RPMs for upgrades through the PrivX Web UI, see Uploading Component-RPM Files Into PrivX.
Upgrading PrivX Deployment
This section provides instructions for upgrading your PrivX deployment.
Single-Server Deployment Upgrade
Ensure the PrivX database has enough free space before upgrade: Migrations during upgrade may temporarily triple the database size. If necessary, you may reduce the database size before upgrade with Data Retention settings.
To upgrade the PrivX server, gain root-terminal access to your PrivX server and run:
yum install PrivX
The system fetches and sets up the latest PrivX package. Upgrade is complete once the command completes.
If you haven't set up the PrivX product repository, obtain the latest version from available from Get PrivX software and run:
yum install PrivX-*.x86_64.rpm
PrivX services are automatically stopped during the rpm upgrade, then automatically restarted by postinstall.
High-availability Deployment Upgrade
For instructions about upgrading high-availability deployments, see PrivX high availability deployment.
Upgrading Optional Components
PrivX Extenders, Carriers, and Web Proxies can be upgraded after PrivX-server and database upgrade. The specific steps for each optional component are provided in the following subsections.
Upgrading PrivX Extenders
There are two ways for upgrading Extenders:
- Option 1: Uploading the new RPM to PrivX, then upgrading Extenders via the GUI.
- Option 2: Upgrading Extender RPMs on Extender machines.
Option 1: upgrading Extenders via the GUI is not supported for Extenders running on Amazon Linux.
Option 1
-
Upload the Extender RPM to PrivX, as described in Uploading Component-RPM Files Into PrivX.
-
The Extender machines must be able to verify any new RPMs used for upgrade: If not done already, you will need to set up our GPG key on the Extender machines.
You can obtain the GPG key from the SSH Repository.
Gain root terminal access to your Extender machines. Upload the GPG key there. Then import it with (replace
/path/to/info.fi-ssh.com-pubkey.ascwith the path to the GPG key):rpm --import /path/to/info.fi-ssh.com-pubkey.ascThe Extender machine can now verify RPMs on upgrade.
-
Access the PrivX GUI, on the Monitoring→Status page, find and expand your Extender instances.
-
Under Version, the version should have an Upgrade Available tag.

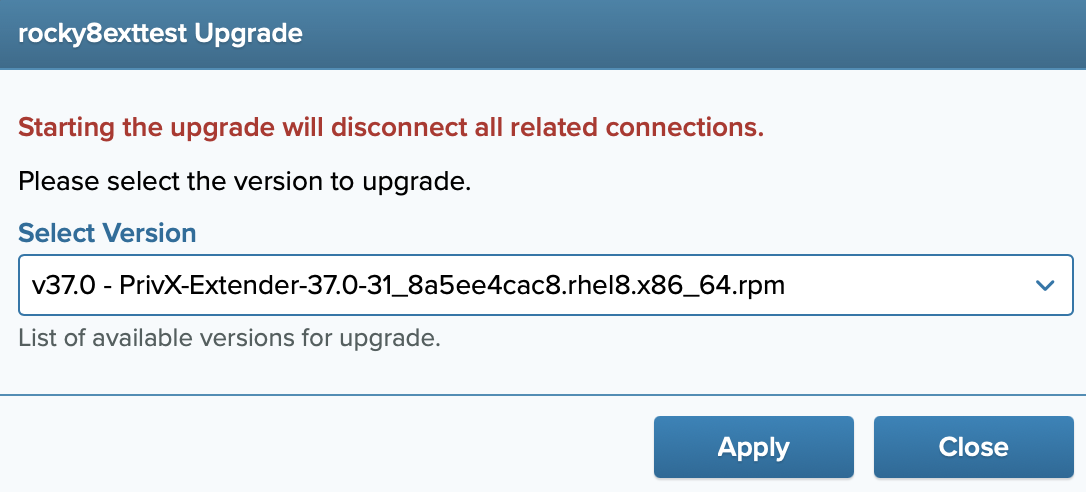
Click ☰ next to the version and select Upgrade.
-
Select the RPM version you want to upgrade to. Then click Apply.
The target Extender will automatically upgrade and restart. The Extender should be functional after a few minutes.
-
You may need to manually merge extender-config.toml changes.
noteExtender upgrades do not upgrade the RPM library, so running
rpm -q PrivX-Extenderon Extender machines will show the wrong RPM version.If you want to revert to the version in the RPM library, you can do so by running:
/opt/privx/scripts/privx-extender.sh revert_to_original_rpmYou can upgrade the RPM version with installation Option 2, described later in this guide.
noteBy default, Extenders will verify any RPMs used for upgrade and abort upgrade on failed verification. You may toggle verification using the
require_signaturesetting in the Extender configuration file. We recommend keeping this enabled in production environments.
Option 2
-
Install the latest Extender package to the Extender machine:
-
If the PrivX repository is enabled on the machine. Install the package with the following.
-
On non-FIPS Extenders:
yum install PrivX-Extender -
On FIPS Extenders:
yum install PrivX-Extender-FIPS
-
-
Without the PrivX repository, go to Settings→Deployment→Deploy PrivX VPC/VPN Extenders and click Download PrivX Extender. Then copy the RPM to the Extender machine and install it with (replace `/path/to/PrivX-Extender..rpm`* with the path to which you placed the Extender package):
yum install /path/to/PrivX-Extender-*.rpm -
-
You may need to manually merge extender-config.toml changes.
-
Run postinstall to complete the upgrade:
/opt/privx/scripts/extender-postinstall.shnoteUpgrading Extenders in this way will remove any upgrades installed with Option 1.
Upgrading PrivX Carriers and PrivX Web Proxies
PrivX Carriers and Web Proxies together enable web connections, and should be upgraded together.
To upgrade PrivX Carriers:
Before upgrading, ensure the Carrier host has enough free disk space for the Carrier package and browser image. Web sessions cannot start if the container-storage filesystem, typically /var, cannot fit the image.
-
Install the latest Carrier package in either of the following ways:
- If the PrivX repository is enabled on the machine. Install the package with:
yum install PrivX-Carrier- Without the PrivX repository, go to Settings→Deployment→Deploy PrivX web access gateways and click Download PrivX Web Access Gateway Components:
Then copy the rpm to the Carrier host and install it with (replace `/path/to/PrivX-Carrier..rpm`* with the path to which you placed the Carrier package):
yum install /path/to/PrivX-Carrier-*.rpm -
You may need manually merge carrier-config.toml changes
-
Run postinstall to complete the upgrade:
/opt/privx/scripts/carrier-postinstall.sh
To upgrade PrivX Web Proxies:
-
Install the latest Web-Proxy package in either of the following ways:
- If the PrivX repository is enabled on the machine. Install the package with:
yum install PrivX-Web-Proxy- Without the PrivX repository, go to Settings→Deployment→Deploy PrivX web access gateways and click Download PrivX Web Access Gateway Components:
Then copy the rpm to the Web-Proxy host and install it with (replace `/path/to/PrivX-Web-Proxy..rpm`* with the path to which you placed the Web-Proxy package):
yum install /path/to/PrivX-Web-Proxy-*.rpm -
You may need manually merge web-proxy-config.toml changes
-
Run postinstall to complete the upgrade:
/opt/privx/scripts/web-proxy-postinstall.sh